

sidewalk chalk | eraser (covered the back with silver glitter washi)
Y'all know I love a good chalkboard, and I've made a bunch in the last few years. Our new place has double the space of our cute house back in SoFlo, so I thought Z needed a chalkboard upgrade.
A couple of months ago, before all of the Scout business, the Hubs and I brainstormed a few ideas and came up with a magnet board and chalkboard duo. And I love the results!


I started with an extra piece of cabinet grade ¾ inch plywood. As random as it sounds, we actually had some of this laying around from another project, which was per-fect, cuz when it comes to chalkboards - the smoother the better. I had my little helper give it a light sanding.

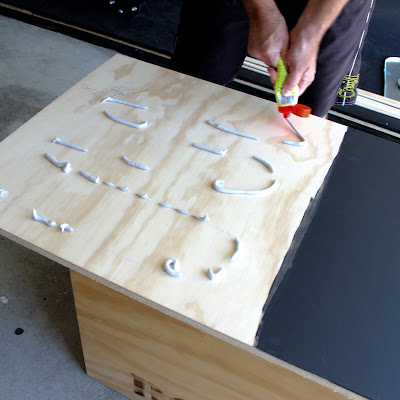
I picked up a big oil drip pan at Walmart, with the intention of cutting the raised edging off. Cut it to size with metal snips, and glued it on the plywood with a little StrongStick, then the Hubs placed a weight on it to make sure the adhesive did it's job. On the other half, I primed the wood, and painted a few coats of chalkboard paint.

We put this board in our family room, so I wanted it to look a little classier than just a slab of wood, so we framed it out with some trim on the front and sides, stained it (I picked Minwax English Chestnut), threw on a coat of poly, and let it cure in the garage for a few days. (I'd love to use a more eco poly product like this one, but they are a little pricey. Instead I use Minwax Polycrylic for my projects, and I just leave whatever I'm working on in the garage to off-gas for a few days before I bring it in the house.)

Since the kiddo is still little, we keep this guy on the floor (with a little towel under the chalkboard side to protect the carpet, which isn't cute at all but is very effective. #renterproblems), but it can easily mount to the wall once she's bigger. It can also be set vertically, depending on how much space we have. It's a little huge, but I wanted to give Z plenty of room to get creative and have fun.

I'm so happy about the way it turned out, and Z must be, too. This sucker gets used every day!


I picked up a big oil drip pan at Walmart, with the intention of cutting the raised edging off. Cut it to size with metal snips, and glued it on the plywood with a little StrongStick, then the Hubs placed a weight on it to make sure the adhesive did it's job. On the other half, I primed the wood, and painted a few coats of chalkboard paint.


Since the kiddo is still little, we keep this guy on the floor (with a little towel under the chalkboard side to protect the carpet, which isn't cute at all but is very effective. #renterproblems), but it can easily mount to the wall once she's bigger. It can also be set vertically, depending on how much space we have. It's a little huge, but I wanted to give Z plenty of room to get creative and have fun.


We've got so many more projects in the works around here...including a very slow transformation to Z's room. We just finished a little book shelf (more on that later) and I'm working on a mood board to share with you guys, though that's probably as far as we'll get for a while...like a said, a ssllooooowww transformation!
No comments:
Post a Comment