Sunday, March 23, 2014

DIY Giant Ruler Growth Chart

Growing up, my step-dad kept track of our heights on the back of the spare-room door. It's still there, and I've made him promise that if they ever move, the door moves with them. Since we are renters, with the potential of bouncing around a couple more times before planting roots, we wanted to create something a little more portable. After a little Pinterest perusing, I found about 40 different DIY projects, some more complicated than others. I took some ideas from a few different examples and ran with it.


While at Home Depot for another project, we picked up a 4x6 whitewood plank and it sat in the garage for a good three weeks. Finally, I sanded it, wiped it down with a clean damp rag to remove the dust, and let it dry out for a bit. OK, so I let it dry out for, like, a week. I probably could have started sooner.

Here are the rest of the steps:

1. While the board is drying out, print out some oversized numbers. I chose different styles, but you can really go with whatever fonts float your boat. Just keep in mind that you will be painting in the stain, so you may want to choose fonts that are a little on the chunkier side, especially if you have not been blessed with a steady hand. If you're using Word, go to format-font, and select outline. This will give you the outline of the number like I have below. Makes it a little easier to trace.


2. Position the numbers on the board using a yardstick/ruler/tape measure for placement, secure with painter's tape. Then trace over the numbers with a ball point pen or wooden pencil. Be careful that you don't poke through the paper. You just want to leave the indentation of the lines in the wood. (It's a little hard to photograph, but if you squint and tilt your head to the left while standing on one foot, you should see the outline of the one.)


3. In a well-ventilated spot, "paint" your stain inside the indentations. (I used something we already had on hand - Varathane Wood Stain in Light Walnut.) I suggest starting in the center of the number and pushing the stain towards the edges. Depending on the direction of the grain, the stain could bleed past the number edges, which would be no bueno. So start with just a little bit of stain on your brush and add more light layers to darken. Let this dry for a while. (An hour or two is probably fine. I, of course, let it dry for about a week.) **If you are a super anal perfectionist, like me, this step could take a while. It's so worth it, though!


4. Now it's time to finish the stain. There's a few ways to do this, but I chose to dilute the Light Walnut with some paint thinner to get a lighter version. I was worried the big numbers wouldn't show up enough, so I played around with it until I found a shade I liked. Using an old paintbrush (one you can just toss after) lightly brush on the stain, let it soak for a few minutes, and wipe off with a clean rag. It's always best to use thin coats. 
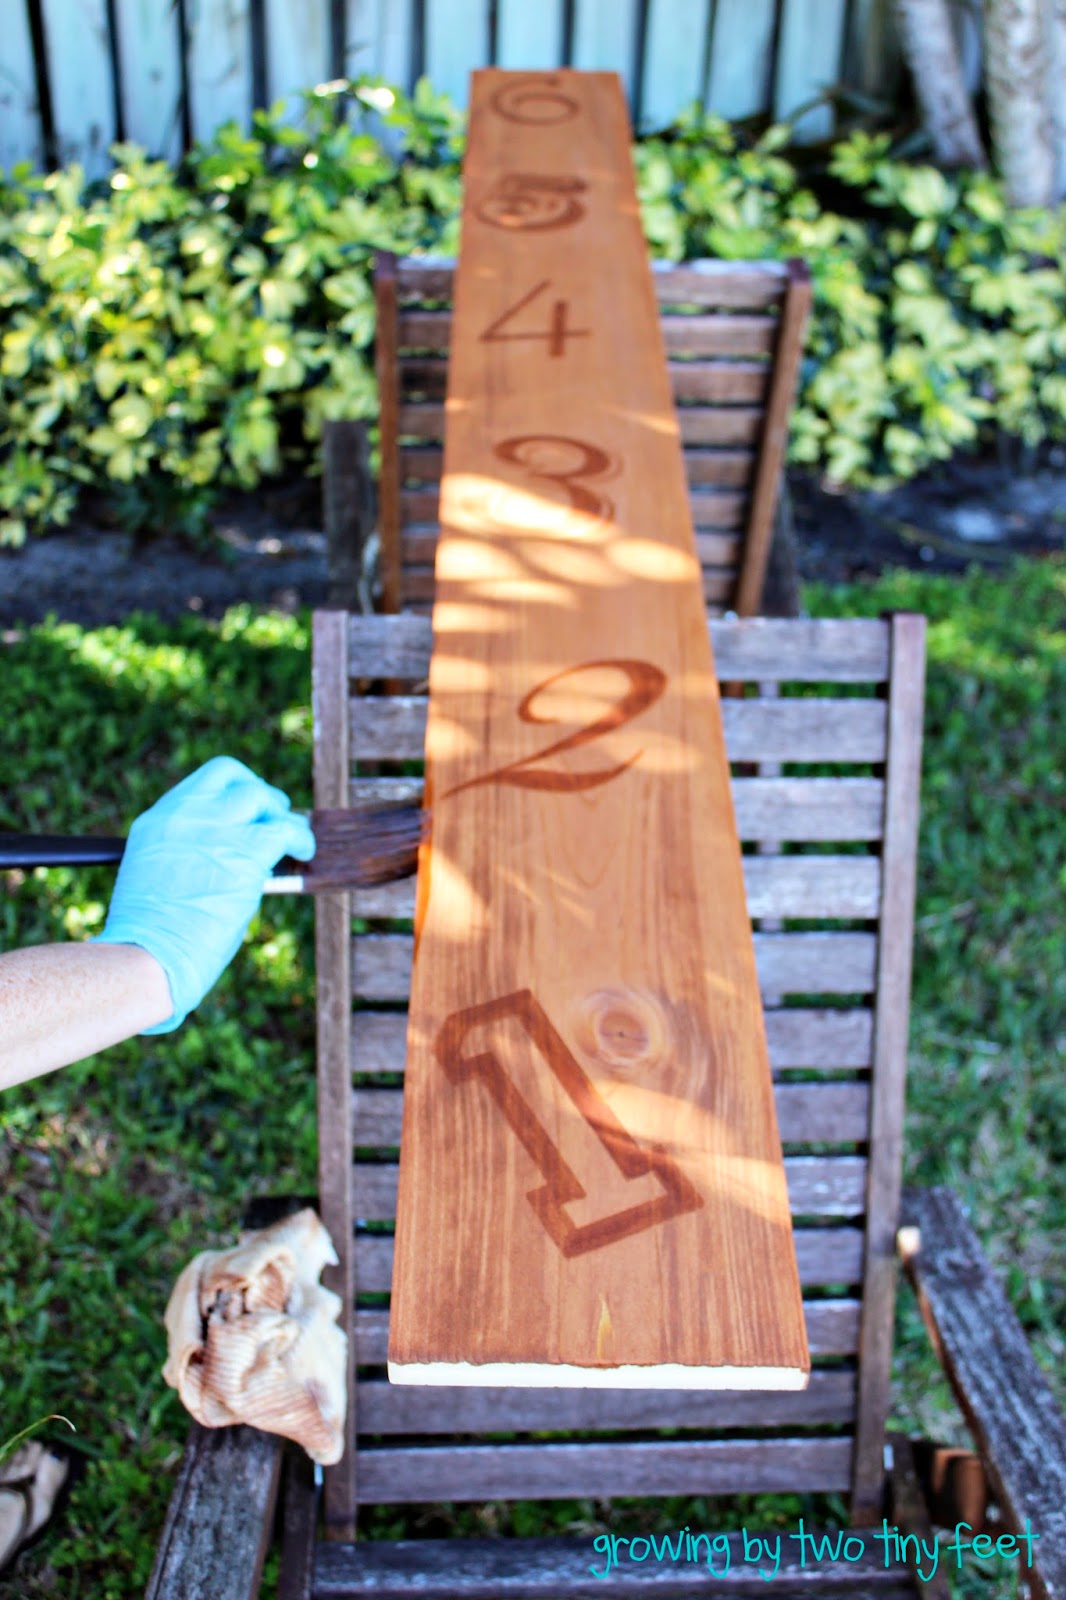

I only needed one coat, but you can add more to reach your desired color. I also added one coat of clear satin poly (which we already had), just to richen up the color and toughen up the wood a bit. 


Let it cure according to the directions on the can. I let it sit on the back porch for a few days, until the smell had faded. 

5. Using an oil-based paint pen (Sharpie is my favorite) and a yardstick/ruler/tape measure, mark off the hash marks. I started ours at 6 inches. That way it clears the baseboards when hanging and goes to 6 foot 6 inches, which covers the possible height of any future children (the Hubs is 6'4", so it's possible).


6. With craft paint and a pouncer, use a stencil to add the numbers to the board. (I got so into my paint pouncing, I totally flaked on taking a pic of this step! Ack!)

7. Once the numbers are all dry, add your measurements. I used a medium point pen to draw the hashmarks and an extra fine point to write in the measurements.


8. Hang on the wall and enjoy!


Happy DIYing! 


Monday, March 17, 2014

Happy St. Patrick's Day!


Happy St. Paddy's Day friends! 

Today, the Hubs and I kept things kind of mellow. He's off on Mondays, so we went for a run together this morning and, other than a trip to Publix, stayed totally unproductive all day. It's been wonderful. Z recently took her first steps, so we spent most of the day on the family room rug playing and watching her practice her new skill. 


I totally flaked this year and completely forgot to get Baby Tuna any kind of holiday outfit. I may have been a bit gun-shy after last year's experience. And somehow Z doesn't have a stitch of green in her wardrobe. How is that possible?! Thankfully, a cute tutu that my MIL got for her last year (and was waaayyy too big) still fit, in spite of being size 3 months! I had all kinds of plans to order a cute clip or headband for the holiday, but Z is fiercely anti-headwear these days. (The barrette in the pic below was removed shortly after the photo was taken.) 


And, in the interest of keeping things holiday-appropriate, we all enjoyed a festive and delicious snack this afternoon. 


Z inhaled her whole plate of fruit, including the blueberries, which she had only had in purees before today. And for the Hubs and I, I mixed some vanilla greek yogurt with a little agave and cinnamon to dip some of the fruit in. So good! 

And for a less healthy, but equally festive treat...


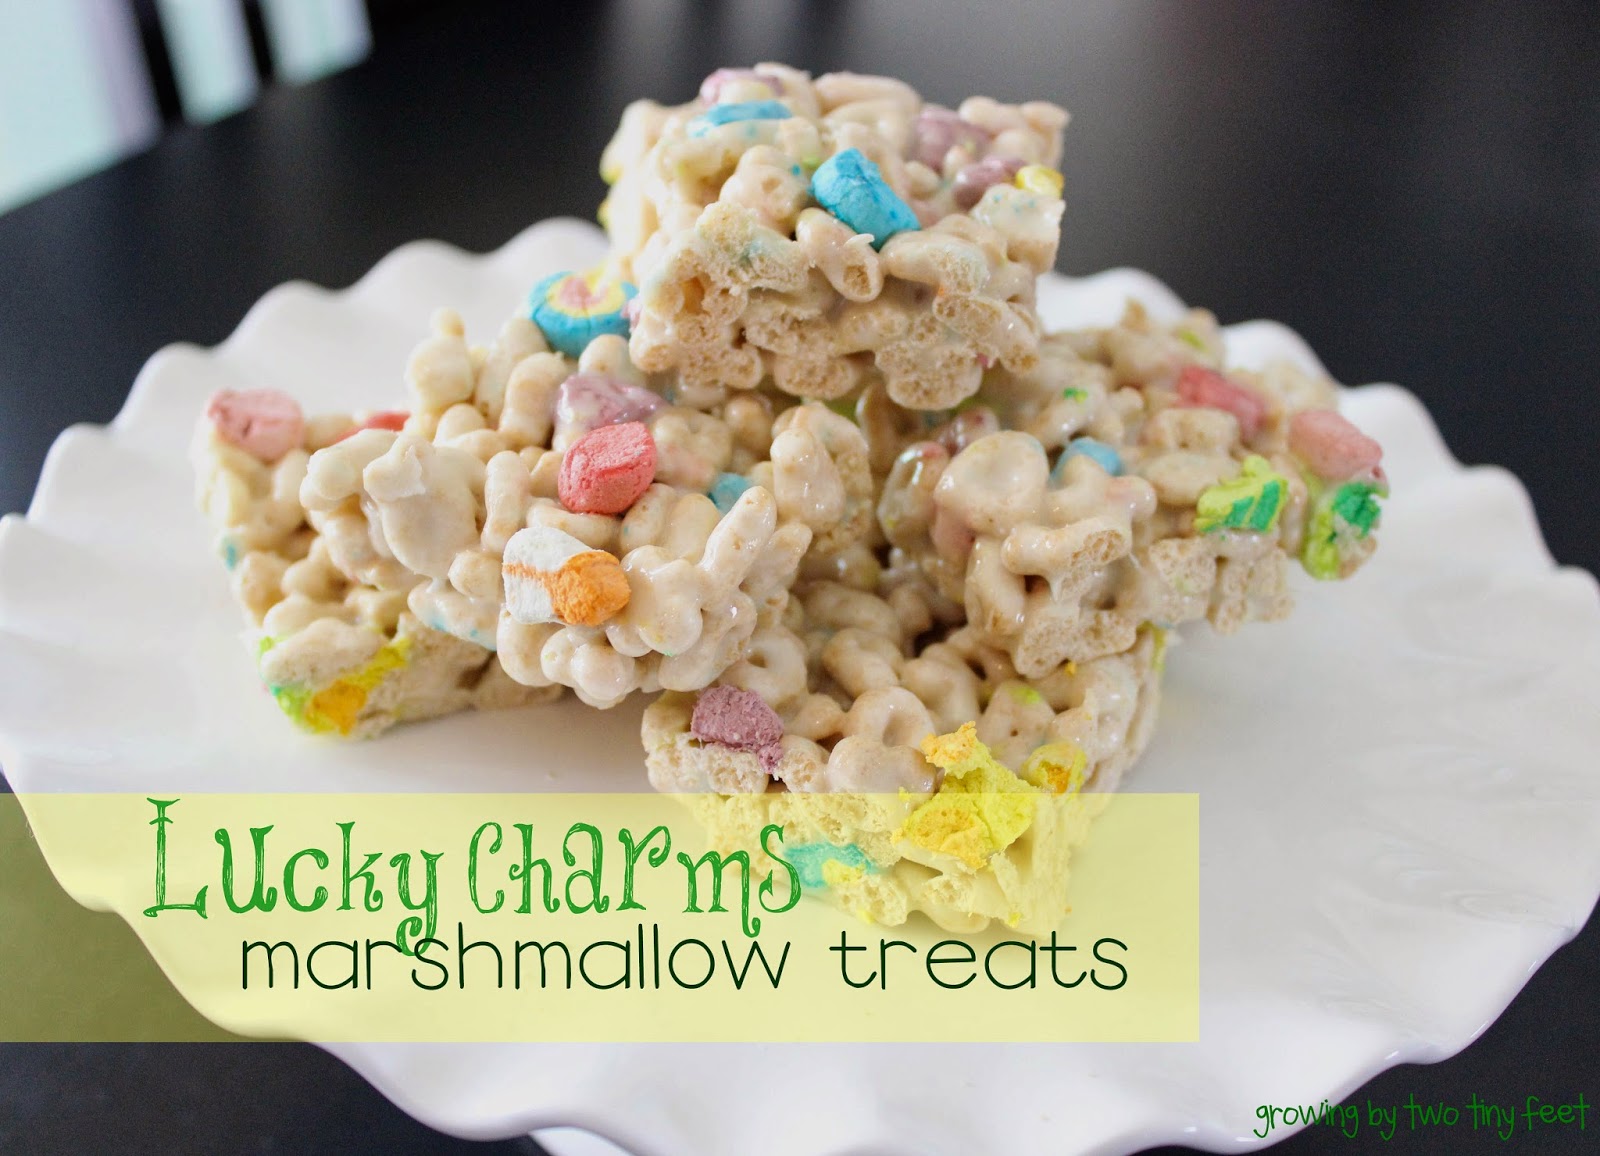
On Friday, I told you guys that we had been snacking on Lucky Charms. Probably my favorite cereal of all time (ok, three-way-tie with Cinnamon Toast Crunch and Honey Nut Cheerios). Since we had them around, Baby Tuna and I made some yummy marshmallow treats using Lucky Charms instead of Rice Krispies. I was so proud of myself, thinking I had come up with a brilliant original idea, only to find a million versions of it on Pinterest. Duh. 
So it turns out I may not be as clever as I originally thought, but these things are so addictive and way better than regular Rice Krispie Treats. Make some...you won't be sorry! You can find the recipe here.

Hope you guys are all enjoying the holiday!


Friday, March 14, 2014

Friday Favorites

1. While the rest of the country has been buried under snowdrifts and polar vortexes (vortices?), SoFlo has been experiencing Spring since, well, November. The Daylight Saving time change made Spring seem more official, so now I can get over the fact that we never got more than maybe 3 days of winter. Now it's open windows, art shows, playing outside, and wishing we had a heated pool to enjoy all the sunshine.


Although we've been keeping Z on her regular routine, the extra daylight and warm days before this last cool front gave her a chance to have her first backyard bath. The bubbles didn't last very long, but she had fun with more space to splash.

polka dot swim pants - Honest Co. 

2. And since we have Spring on the brain around here, I'm dying over these sweet Easter pjs that I can't wait to order for the bambino. I mean seriously cute!!

3. I know that Radiant Orchid is the color of the year, but I can't get enough of this Under the Twilight polish by essie. It's a navy blue that goes so well with all of the springy colors you may be wearing right now. Obsessed!

4. Pigtails!!


5. Any lovers of Naked Juice out there? I was never a big fan, thanks to the gritty texture they always seem to have, but while shopping at Whole Foods with and empty stomach one day, I grabbed this pineapple-mango-coconut water and practically chugged the whole thing in the check-out line. So good and not gritty or coconutty at all. I just wish they sold them at Publix...or by the case.

6. And with St. Patty's day around the corner, Lucky Charms have made an appearance in our house. Even Z had a taste - heading for the marshmallows first before devouring the cereal pieces, too.  To keep things festive, without loading my kid up with refined sugar (we'll save that for when she's a bit older), I'm loving the idea of these rainbow kabobs (minus the stick for the bambino, of course). We eat a ton of fruit around here, so these are perfect!


Have an amazing weekend friends!!